|
Muzzle Blasts Online |
|
...for the muzzleloading enthusiast |
|
The muzzleblasts.com domain, subdomains, content, etc., are neither affiliated with the NMLRA nor its paper magazine Muzzle Blasts |
|
Muzzle Blasts Online |

|
|
|
|
|
|
Closet Antler Crafts
by Wm. Hovey Smith
After the clatter stopped, Thresa said in a steady low voice, "If you don't do something with these--horns, I'm going to throw them out. I don't mind your deer on the walls, but get those horns used or get them gone." My wife unhooked the pot she wanted from the buck's skull that had fallen to the closet floor and stomped back into the kitchen.
"But Hon..," I tried to say, but it was too late. By the way the pots were being clanged in the kitchen, I concluded that she had no desire to comment further.
Like most hunters, I had a collection of antlers from deer I had shot, from sheds I had recovered, or from dog finds. I had always planned to make something out of them, but never got around to the doing. My wife's use-'em-or-loose-'em ultimatum sounded serious. Besides, it was between duck and turkey seasons. "I'll work it in,'' I thought.
I did need a priming horn. I had tried one that spit powder out in dribbles, and now I used a small bottle that poured powder into the pan, onto the gun and everywhere else. I wanted a container that would direct priming into the pan and hold enough to get me through a match.
I chose a jigsaw with a metal-cutting blade to cut the horn from the skull. I finished the trimming after placing the horn in a wood-worker's vise and buzzed off the upper portion and a not very useful sticker point. What remained was a relatively straight section of the antler with a slim brow tine.
Because of the antler's irregular shape, I drilled it from both the top and bottom to make a cavity large enough to hold a decent amount of powder. The most challenging job was snaking a long thin hole down the brow tine to intersect the powder cavity. I sharpened the end of a Phillips screw driver, cut off the handle and used this as a drill to complete the hole.
After removing as much material from inside the horn as I dared, I sawed a slice from the antler base remaining on the skull and used the flat disk for the bottom of the priming horn. This slice was attached with glue and two brass upholstery nails. I made a stopper for the pouring spout from a bent nail and topped the nail with a small cylinder of antler. Bending the nail tightened the stopper in the spout. The top of the priming horn was plugged with a cork.
The ugly antler made an ugly priming horn, but it worked. I still had antler left. I thought that one of the small points would do for the handle of a pan brush. I had already tried a mascara brush, but I considered that a bit on the effete side. All I now needed to make a more manly version was bristles. Looking out my window, I saw my lab, Persiphone, soaking up the winter sunshine. I got the surgical scissors from the bathroom and went onto the front porch.
Perhaps made cautious by the tone of my voice, Persiphone approached warily. As soon as she saw the shiny scissors, she knew that my call had nothing to do with a sudden desire on my part to give her a good belly scratch. She fled to the woods.
"So much for authenticity,'' I thought as I cut the bristles from an old paintbrush. I dipped three bunches of bristles into glue and put them into a trio of holes that I had drilled at the base of the antler point. I added a bit more glue over the tops of the holes and let the glue cure for five hours. The result was a brush with bristles stiff enough to remove even sticky residue from a priming pan.
This used up the horns on the skull, but I did have a rodent-chewed antler that would do for a candlestick. All it required was trimming the tips so that it would sit on a smooth surface, plus a hole drilled for the candle. Not pretty enough for a Steinway Grand, but suitable for a back porch table.
Antler is unique as it combines an irregular shape, allowing a good grip, with a smooth surface that is pleasant to the touch. These qualities make it an appropriate handle material for almost anything that must be thrust, drawn, held or pointed.
My attention now turned to handles for files and cleaning rods. A file with a handle allows more pressure to be put on the work and protects the hand from being abraded as much as the work object. I cut a section of antler that had a hand-filling curve and filed the ends of the horn smooth. I then drilled a hole for the file spike, jammed it in with some glue and was done.

|
|
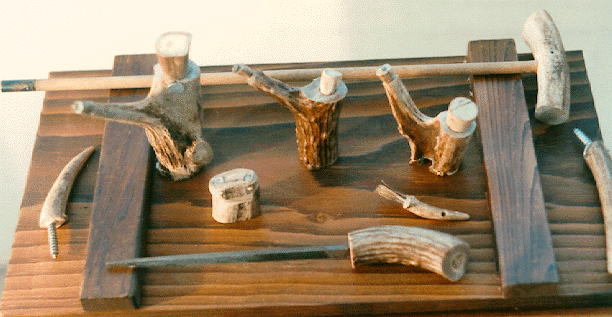
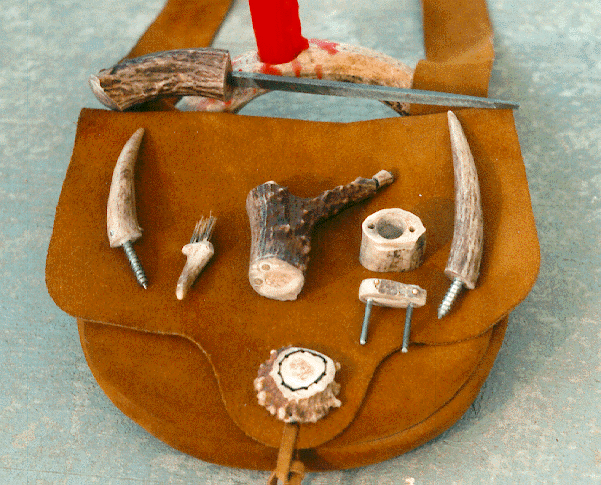
Three priming horns, a pistol cleaning rod (top), a handled file (bottom), two clothes hooks (left & right) and a cap box and pan brush (lower center). |
Buttons were next. I was surprised how few antler sections are actually round. The best round segments came from points and small antlers. These were cut to thickness with the jig saw, smoothed with a file, and drilled for thread holes.
To make a better looking priming horn, I used a fresh shed and fitted a horn plug instead of using a cork. Fitting the plug was a time-consuming cut-and-try task.. The cork on a previous creation worked as well or better.
I was hitting my stride; my confidence was high, but I was running out of material. On the walls of my workroom was "Birthday Deer." This was one I shot at 10 A.M., when Thresa and I had reservations for a formal dinner 65 miles away at 2 P.M. She had helped me drag this one out. No. It would stay. While not a trophy, it ranked as a significant other.
What remained was a pair of antler tips which I thought would make fine clothes hooks. I found two wood screws in my junk box with stripped heads. I cut the heads off, drilled the antlers, and glued and pinned the threaded screws into the tips.
"Theresa? Where do you want these?" I asked, beaming proudly as I displayed my handiwork.
"That's fine, Hovey," she replied. "But this is Whitehall, not 'Little House on the Prairie.' "Don't you need hooks in YOUR closet?"
