|
Muzzle Blasts Online |
|
...for the muzzleloading enthusiast |
|
The muzzleblasts.com domain, subdomains, content, etc., are neither affiliated with the NMLRA nor its paper magazine Muzzle Blasts |
|
Muzzle Blasts Online |
|
|
|
|
|
|
Making and Using a Bow Drill
|
|
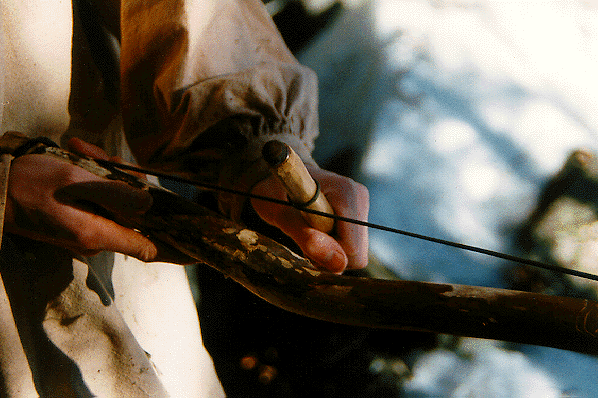
The correct way to wrap the cord around the drill. |
Some of my earliest childhood memories are attending the NMLRA rendezvous with my father and mother, visiting with old friends, sitting by the fire, and most of all the activities: knife and hawk, shooting a muzzleloader, and fire making with flint and steel. Flint and steel was always my favorite. Knowing that I could start a fire without matches was a tremendous source of pride and security for me. In some survival situations, without fire, your life can be in danger.
Eventually I realized that starting a fire with flint and steel was not much of a challenge any more. By then I had become good with the throwing implements, and I wasn't totally captivated by the shooting. When my parents' schedule became increasingly busy, my rendezvous experience was temporarily interrupted.
But last year my father and I attended a class at Tom Brown's Nature and Wilderness Survival School, and that has helped me get back on track. For ten years of his life, Tom Brown was mentored by an Apache Indian named Stalking Wolf. Among other skills and techniques, Stalking Wolf taught Tom the bow drill. It was Stalking Wolf's wish that everyone learn that skill, so I would like to share this simple yet paramount skill with you now.
Out of the twenty-six different fire making apparatuses (fire pump, fire crutch, hand drill, flint and steel, etc.), the bow drill is the most reliable and effective; with practice you should be able to start a fire in a blizzard with this device. A coal is produced by friction, placed into a tinder bundle, and then blown into flames, as with flint and steel.
The bow drill involves five parts, four of which I'll discuss now. The apparatus consists of a bow, a spindle, a handhold, and a fireboard. Every piece can come from a single dead branch; or if you prefer, you can make a fireboard of dry cedar, as I have done.
|
|
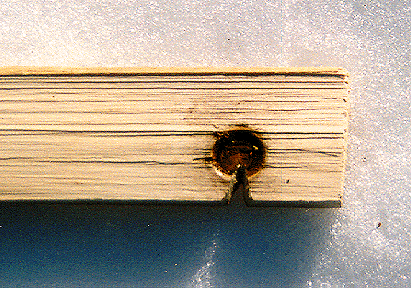
The hearth board with a socket burned in and notched to catch the ember created by friction. |
The handhold is typically made from the same type of wood as the spindle and fireboard, and it usually comes from the same block of wood. It should be about the size of a box of kitchen matches, and should fit tightly and comfortably in the hand without allowing the fingers to wrap all the way around. It should fill your hand as if you were holding a baseball with your palm facing downward.
Once you have cut the handhold to size, a slight depression should be cut into the middle of the handhold's lower surface. You can do this with the point of a knife or even a sharp rock. The handhold is not finished until it is burned in and greased; that will be done after the whole set is completed.
The spindle of the drill is very easy to make. It should be about seven to nine inches long and about three-quarters-of-an-inch in diameter. The spindle should be whittled smooth and pointed at both ends: one end tapers to a sharp point, and the other to a dull point. The dull point is the end placed against the fireboard.
The fireboard should be about twice as long as the spindle, three times the width, and a half-inch thick. Scrape or shave the fireboard flat on both bottom and top so that it roughly resembles a flat board. A few inches from the end of the fireboard, cut or rock-drill a depression much as you did with the handhold. The depression should be deep and wide enough to accommodate the blunt point of your spindle.
Now that the apparatus is complete, it must be burned in. This is accomplished in the same way that fire is made, by spinning the spindle against the fireboard. At this point the procedure is used just to set the sockets into the handhold and the fireboard.
The fireboard is now set onto the ground, and your left foot is placed to the left of the depression you made. The board is slightly ahead of your arch, and the depression is about an inch away from your instep. This puts you into the position that children use when they're learning to tie their shoes. (Lefties should reverse this position and some of the following instructions.)
|
|
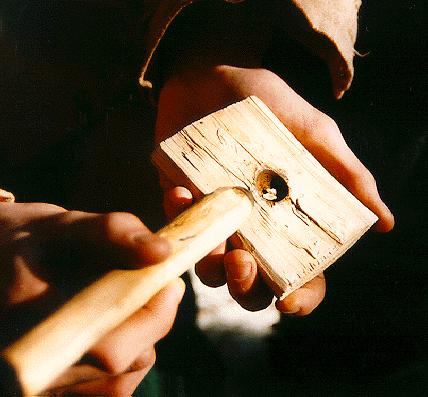
A couple of nodules of old pine pitch added to the handhold act as a lubricant. |
Now, while holding the bow and the spindle together, place the blunt end of the spindle onto the fireboard, and the handhold over the top of the spindle. The spindle should slip into the depressions you made previously.
In a kneeling position over the fireboard, with the bow held horizontally, the spindle straight up and down and held in place by the handhold in your left hand, you should now start smooth, even back-and-forth strokes with the bow, being sure to add a good amount of downward pressure on the handhold so that the spindle doesn't pop out. After a few moments, smoke will start to pour out of the handhold and fireboard. At this point, stop and take a break, as you will probably be pretty worn out. These are new muscle groups you're using and it will take time to develop them, so don't become frustrated if the process seems difficult.
Now that the hand hold and fireboard are both burned in, you will have to lubricate the hand hold. This can be done with various substances: oil from the outside of your nose, sap, crushed-up green leaves, or patch grease, for example. White pine pitch works the best, in my experience. The lubricant should be ground into the handhold depression in a mortar-and-pestle fashion. The addition of lubricant will prevent the spindle from burning through the handhold.
You probably noticed a kind of dust building up around the fireboard socket. This is the dust that will make the coal used in making a fire. The dust would have turned into a coal before, but it had nowhere to collect, so now a place to catch the dust must be carved.
This step is very simple. After burning in, the depression in the fireboard is pie-shaped. Simply use your knife (or a sharp stone, if necessary) to cut a one-eighth wedge out of the pie.
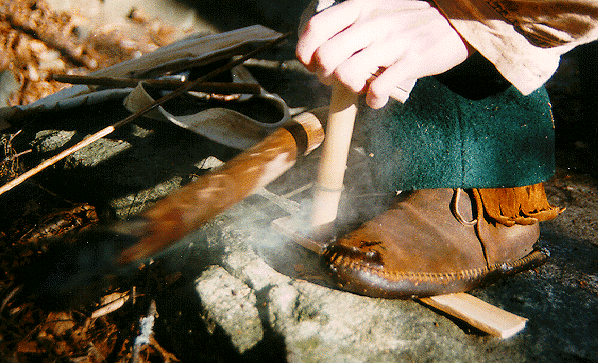
|
|
The fire bow in use; smoke has started and momentarily there will be a usable coal. |
Once the coal forms, you can transfer it from the leaf or bark under your fireboard to a normal bundle of tinder. Then you proceed just as with flint and steel, but with one important exception: you may need to blow very gently to avoid scattering your delicate, powdery coal.
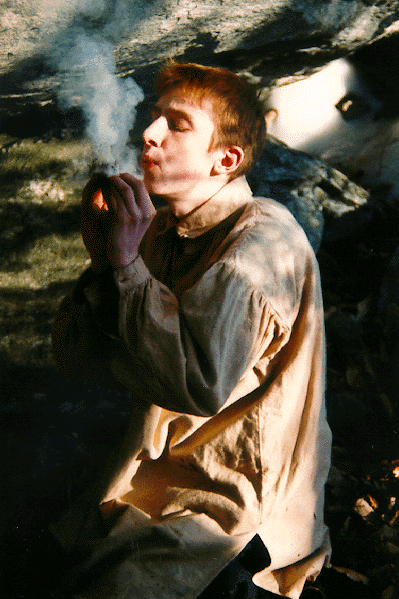
|
|
Once transferred to the tinder nest, the fragile coal must be carefully nursed into flame. |
* Remember, form is everything: slow and steady wins the race! Use long, smooth strokes and the entire length of the bow.
* If the process becomes difficult, try relubricating the hand hold.
* If the depression in the fireboard begins to look shiny, put some sand into it, or rough it up with your knife. This will break up the smooth surface and create friction.
* If your coal gets stuck in the notch, tap the fireboard gingerly with your knife.
* At first, anticipate failure and frustration. Anything new makes you feel like you have ten thumbs, and it will most likely frustrate you. But looking back, all you will remember is the gratification of learning an ancient skill that connects you to a spiritual past and the triumph of that first fire.
I will be conducting a seminar on primitive firemaking at this year's Northeastern Primitive Rendezvous
in Vermont. If I can be of any assistance, please feel free to contact me at:
4 Pineridge Drive,
Putney, VT
05346;
(802) 387-2009.
Happy campfires!